It's been a while since I've done a Technical How-to, recently I wanted to get my head around Azure's firewall appliance, here's an example setup and in true MicroSoft style it comes complete with Point-n-Click screenshots! I'm assuming you at least know how to navigate Azure so post doesn't contain all the possible screenshots, for example I will skip screenshots for creating tags, but that all being said, it's still going to be a long one, hold on tight!
Step1 - Planning
Whilst reading the doc's and getting to grips with the Azure Portal it became clear to me, you really need to plan before clicking, it's sooo easy to get stuff running that I'm confident that most orgs will have objects with generic names like "monitoring server" and then forget details like, which region is the server hosted!
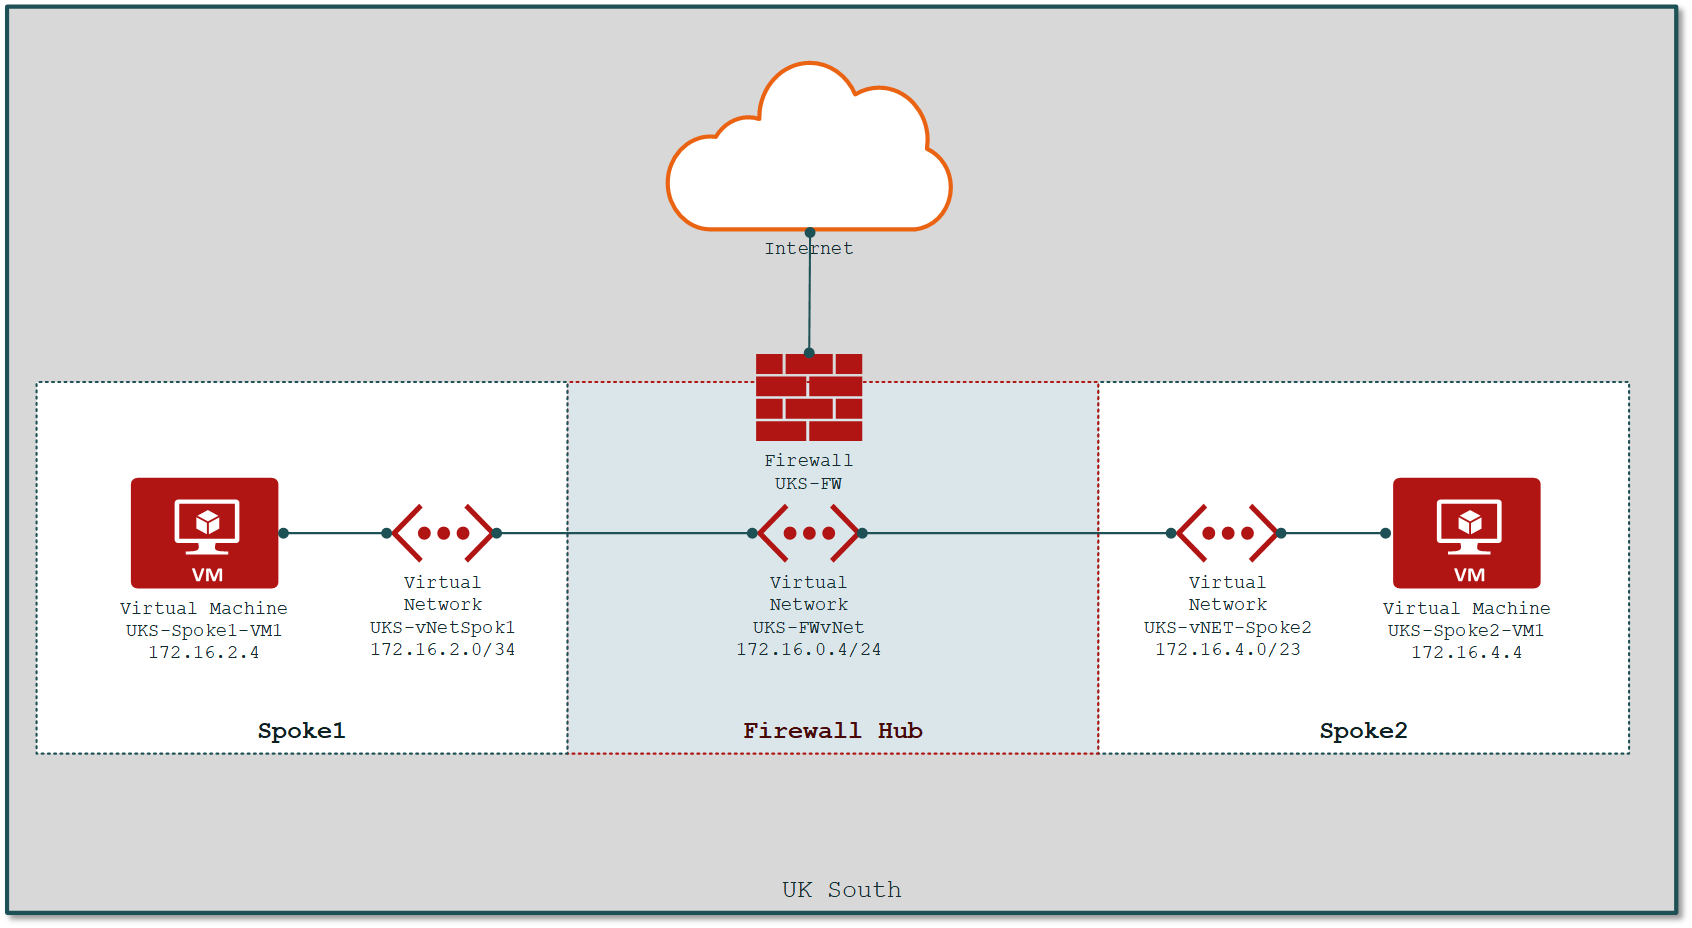
This picture is basically what I want to achieve, 2 servers separated by a firewall appliance for access to the Internet and each other; spoke 1 and 2 are isolated zones.
Naming Convention
To get started I planned a basic naming standard using region followed by a primary identifier and then a description...
UKS-FW-vNET → UK (South) Firewall Virtual Network
or
UKS-Route-Spoke1-to-Hub → UK (South) Routing table, Spoke 1 static routes to Hub
or
UKS-Spoke1-VM1 → UK (South), Spoke 1, Virtual Machine
I'm sure it could be better or more rigid but it should be enough for me to know what's what. In the GUI you can group by type & region so you don't really need these in your naming convention, but it's useful to know priority, in my examples the type "Route" is more important that if it's for Spoke1 or Spoke2 ... but for the VM, the location is more important... it's just a lab, do whatever you want 😉
Resource Group(s)
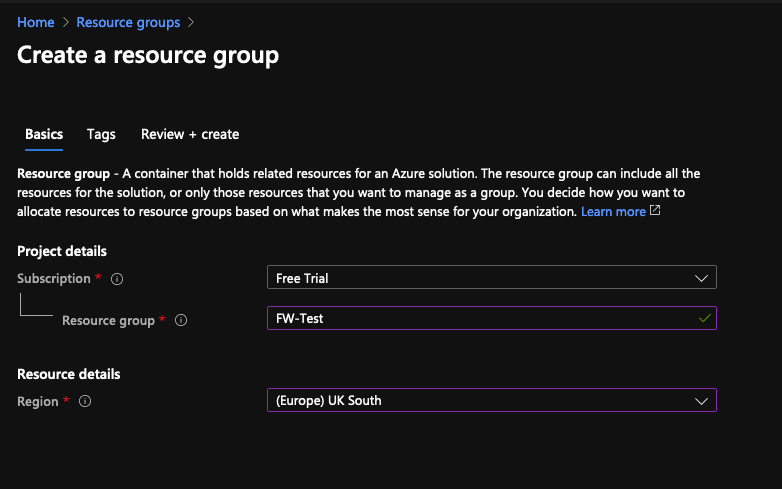
For this example, I'm creating a single resource group and putting it all there; in the real world we would expect to see different networks & VM's in different groups; I'm calling mine FW-Test plan what you need.
Networking (IP Addressing)
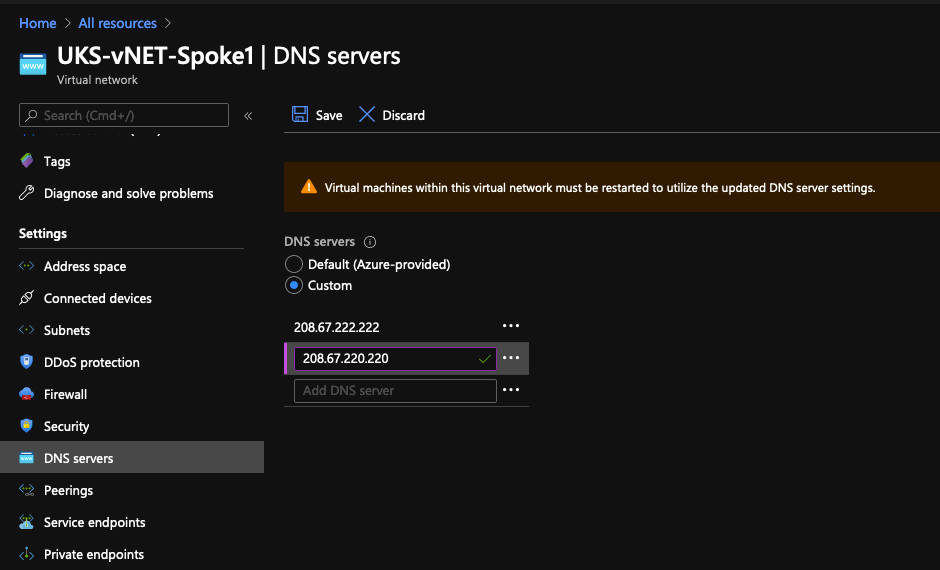
Before defining the IP structure, think about DNS, by default all networks/devices use Microsoft's DNS but now-a-days we expect our DNS provider to add some security filtering & protection, so I'll be using Cisco's Umbrella (OpenDNS): 208.67.222.222 & 208.67.220.220
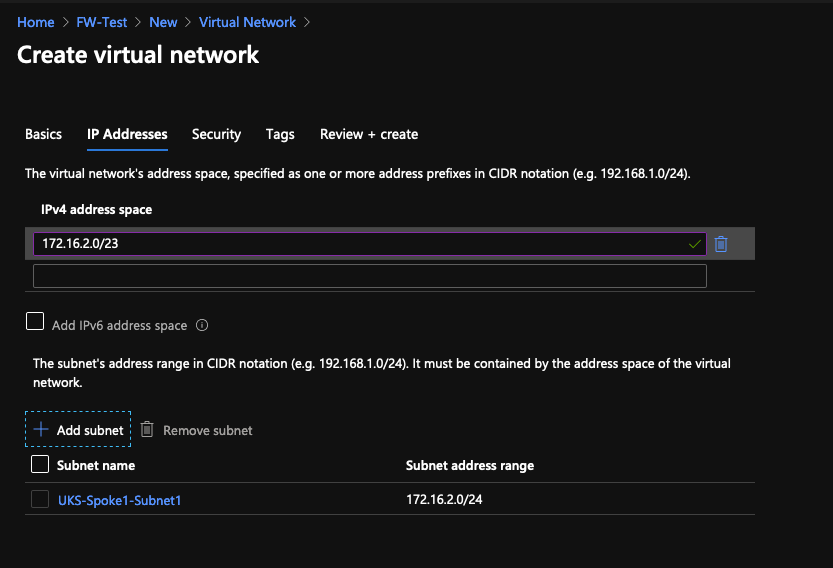
Each Virtual Network is like a zone, it lives in a region and it can be calved up into smaller subnets when needed. I'll be working in /23 chunks, with the first /24 as the "main" subnet leaving the 2nd /24 to be used for other stuff, I'm also going to use the 172.16 RFC1918 space instead of the 10.x generated by Azure to really help show how networking hangs together in this example.
- UKS-FW-vNET1 →
172.16.0.0/24 - UKS-vNET-Spoke1 →
172.16.2.0/23 - UKS-Spoke1-Subnet1 →
172.16.2.0/24 - UKS-vNET-Spoke2 →
172.16.4.0/23 - UKS-Spoke2-Subnet1 →
172.16.4.0/24
Create UKS-vNET-Spoke1 & UKS-vNET-Spoke2
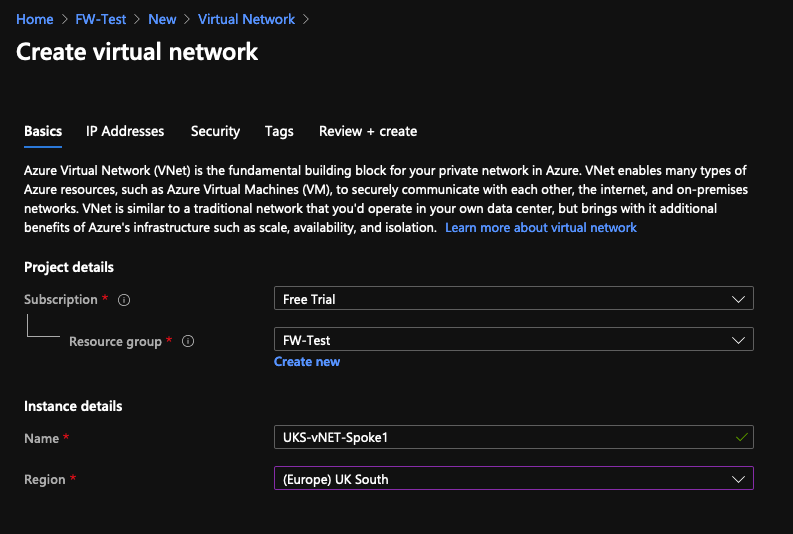
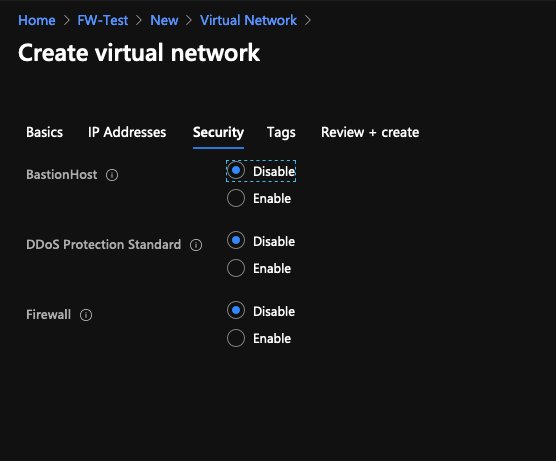
Create the networks spoke networks first but not the firewall vNET, we'll do that after with the FW Appliance; There's nothing special about the Spokes at this stage, here is Spoke 1
Repeat for Spoke2.
After both vNets are built, if you want to use Custom DNS make that change...
Step 2 - Create the Firewall
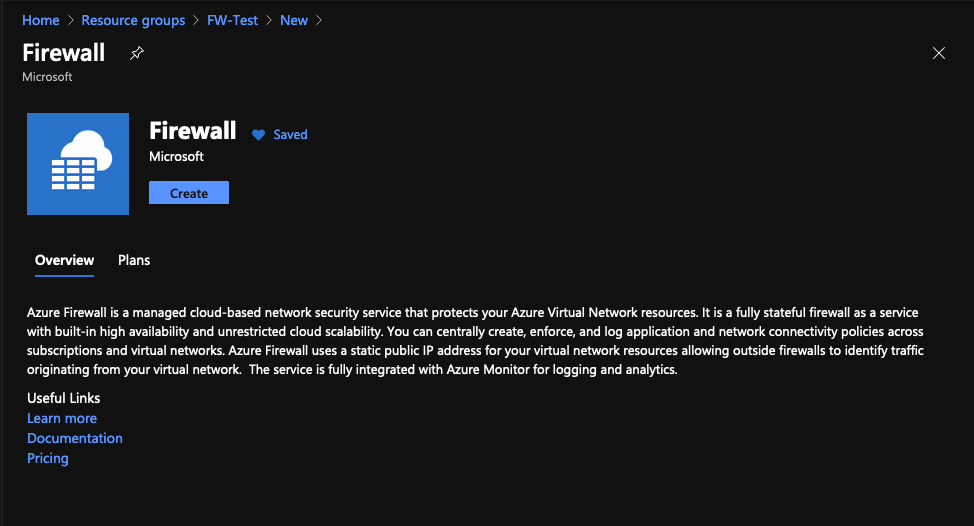
The firewall build takes a little time, let's kick that off!
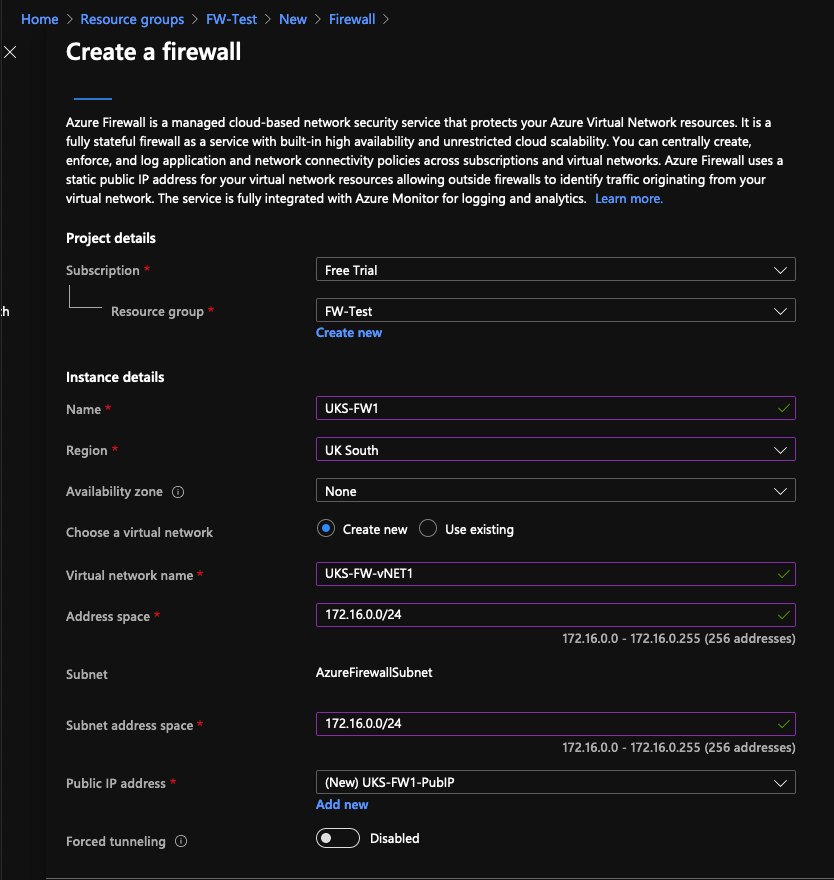
Under the firewall settings, we're going to now define the vNET... notice how the subnet has a special (reserved) name; we also need to create and assign a public IP.
Whilst you're waiting for the deployment...
Setup Logging
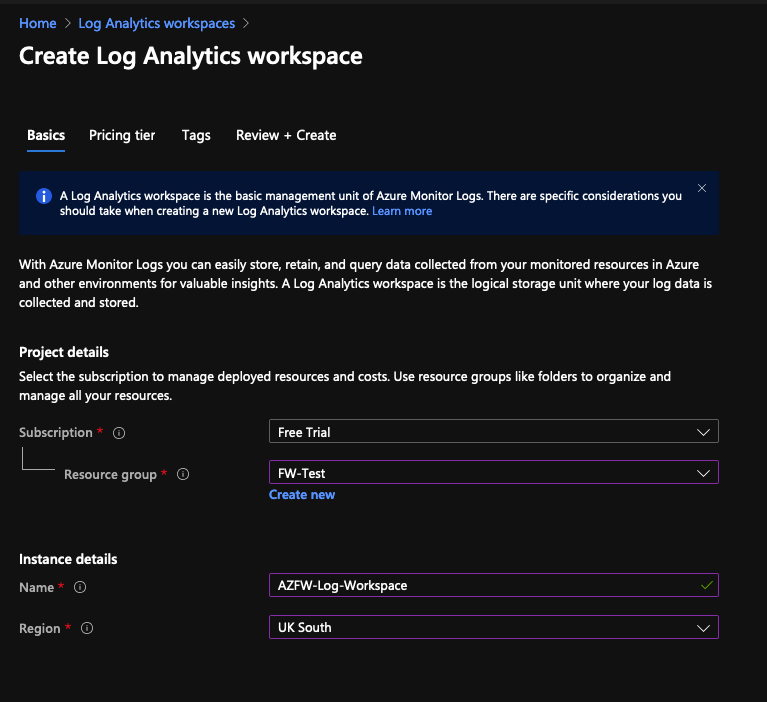
By default you don't get firewall logs, we need to switch that on. Before you start you need a Log Analytics workspace, go and create that.
Create Log Analytics workspace
This is how you access or visualise the FW logs, if you're using the eval/free subscription like my screenshots you'll need to select pay-as-you-go pricing, I've not been charged anything 😬
Setup Diagnostics
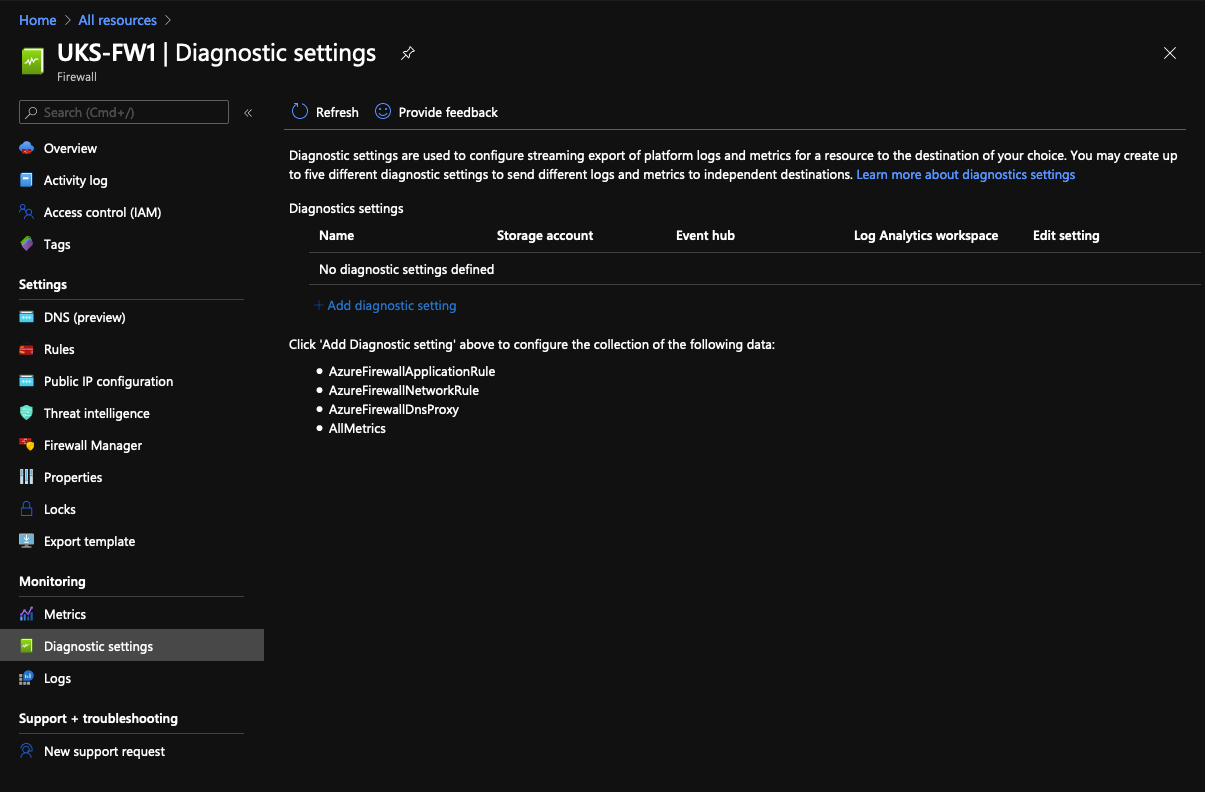
Back on the Firewall, if it's done, setup logging, it's under Diagnostics Settings....
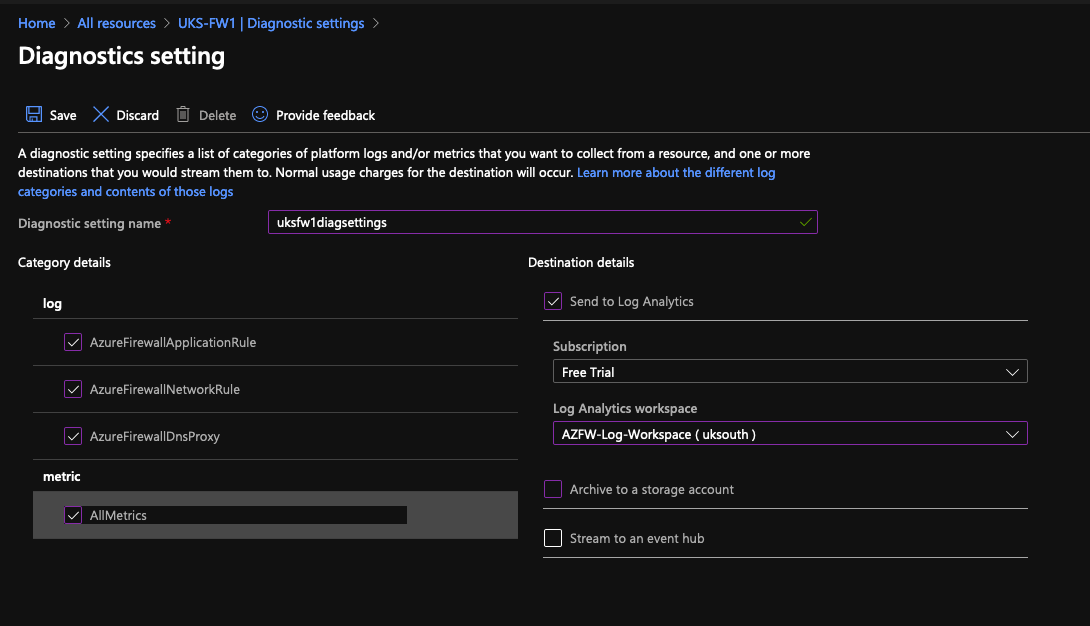
Add a new Diagnostics Setting.
Tick all the lefthand boxes, we want all them logs! On the right, setup Log Analytics to the workspace you created. At this point, don't expect to see anything under the FW logs section, not only do we not have any traffic yet but it can take ~10mins before any hits appear in the logs.
Create some Rules
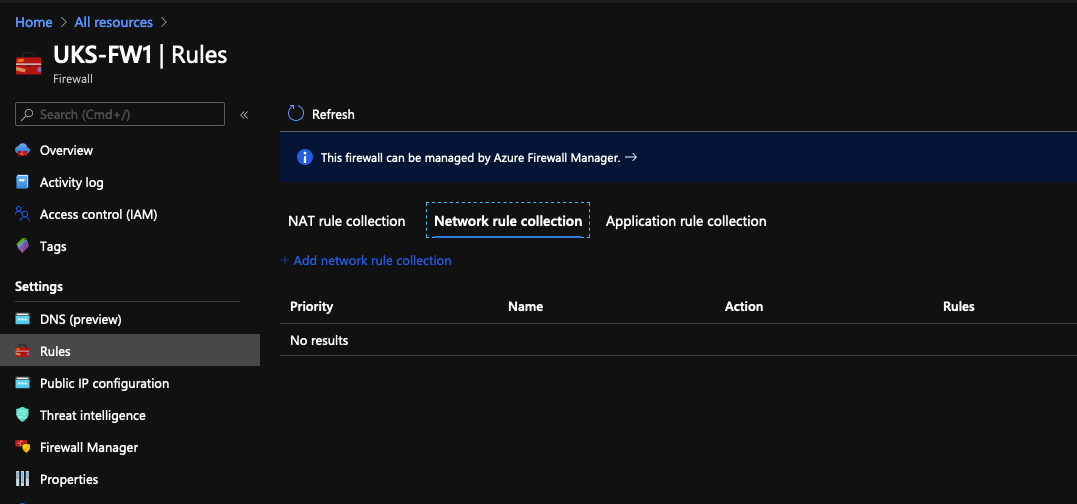
We're ready at this point to create some rules, we're only going to work with Add network rule collection rules.
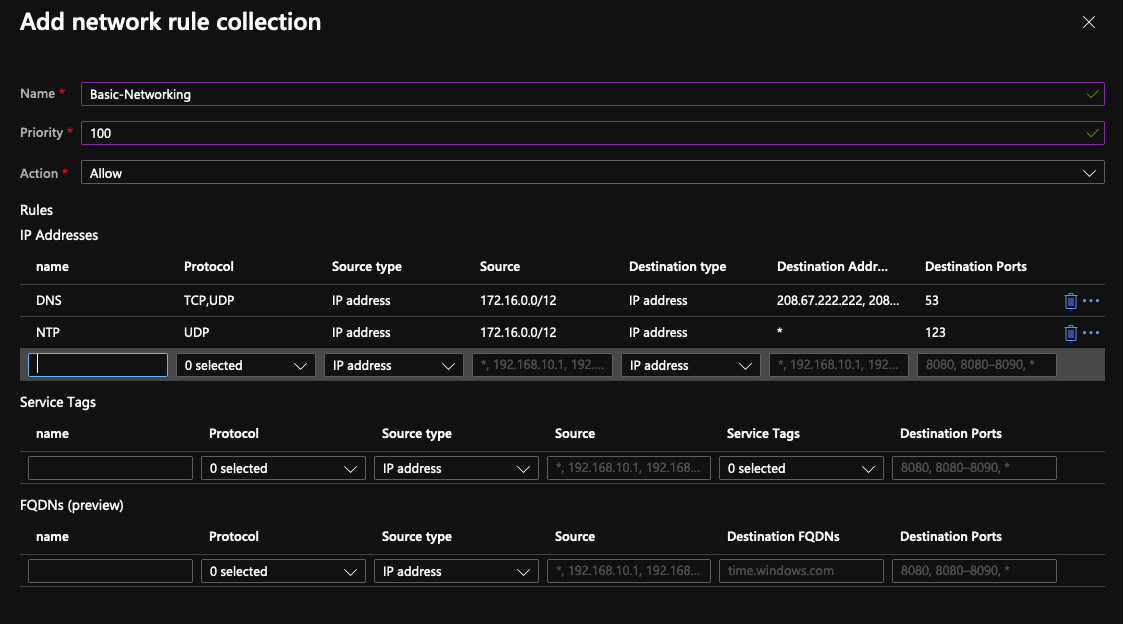
This is where we start and are aiming for, so click add network rule collection and fill in these details...
- Name: Basic-Networking
- Priority: 100
- Action: Allow
- Rule 1:
- Name: DNS
- Protocol: TCP & UDP
- Source Type: IP Address
- Source: 172.16.0.0/12
- Destination Type: IP Address
- Destination Address: 208.67.222.222, 208.67.220.220
- Destination Ports:
- Rule 2:
- Name: NTP
- Protocol: UDP
- Source Type: IP Address
- Source: 172.16.0.0/12
- Destination Type: IP Address
- Destination Address: *
- Destination Ports: 123
We want a nice and simple policy to test basic functionality; repeat the process for the following rules...
- Name: HTTP-HTTPS
- Priority: 1000
- Action: Allow
- Rule 1:
- Name: HTTP
- Protocol: TCP
- Source Type: IP Address
- Source: 172.16.0.0/12
- Destination Type: IP Address
- Destination Address: *
- Destination Ports: 80
- Rule 2:
- Name: HTTPS
- Protocol: TCP
- Source Type: IP Address
- Source: 172.16.0.0/12
- Destination Type: IP Address
- Destination Address: *
- Destination Ports: 443
and
- Name: Default-Deny
- Priority: 65000
- Action: Deny
- Rule 1:
- Name: Deny
- Protocol: Any
- Source Type: IP Address
- Source: *
- Destination Type: IP Address
- Destination Address: *
- Destination Ports: *
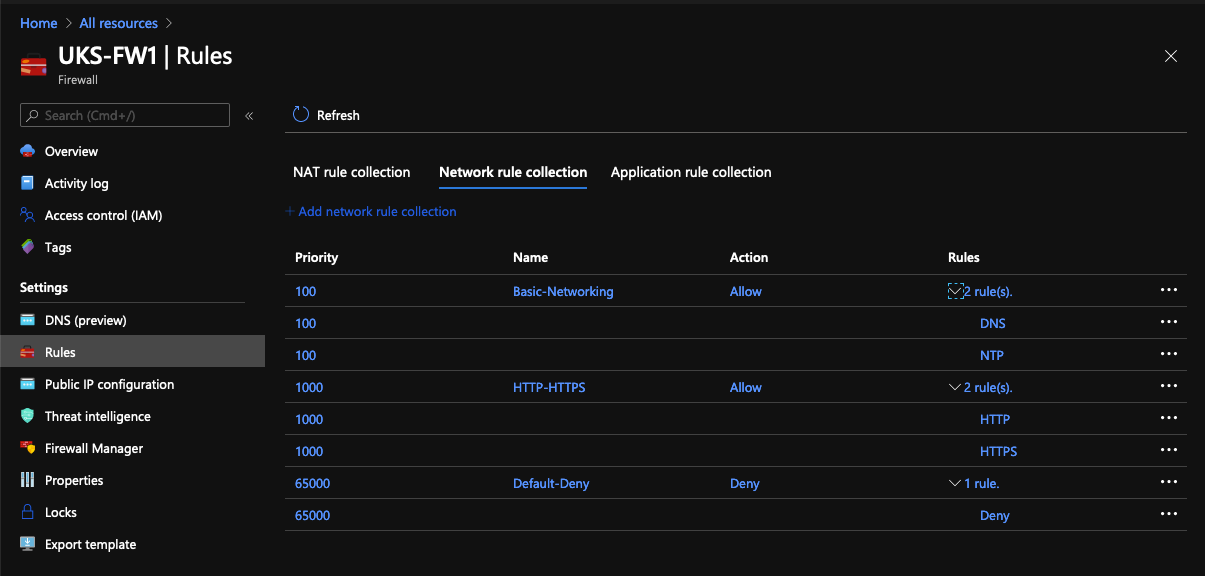
You should end up with something like this:
Azure & ICMP
Ok, a bit of an Azure quirk here! There's a few google hits of people complaining that you cannot "ping out" from Azure to the Internet, but if you want to be able to ping between spokes you can do that... weirdly tho, restricting the rule by IP/Subnet doesn't work, you have to setup an "any" rule 😒
If you want one, create a rule using these settings...
- Name: ICMP
- Priority: 101
- Action: Allow
- Rule 1:
- Name: ICMP
- Protocol: Any
- Source Type: IP Address
- Source: *
- Destination Type: IP Address
- Destination Address: *
- Destination Ports: *
Step 3 Peering
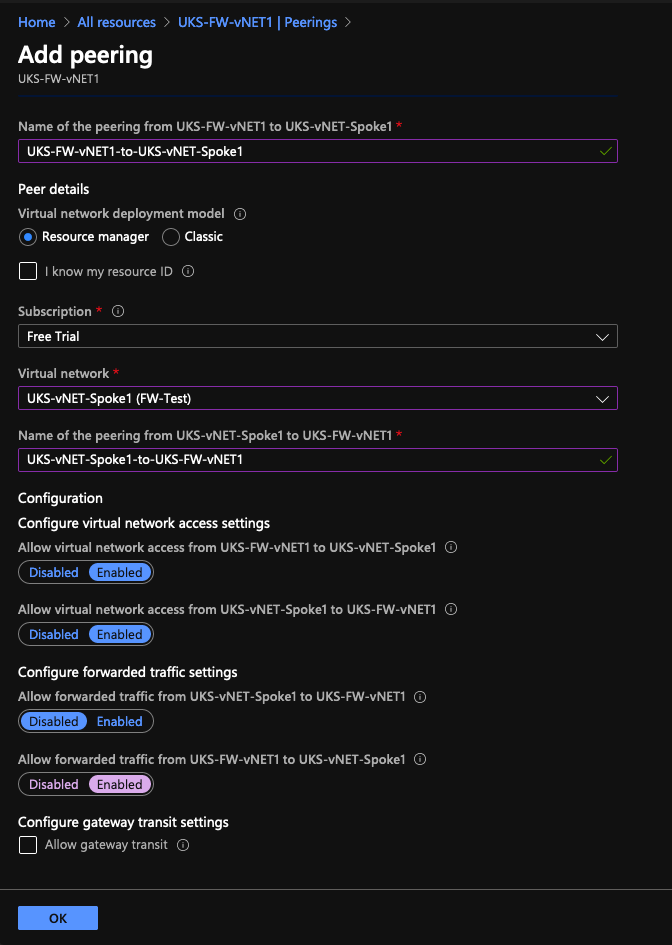
Now we're onto some good stuff! You have 3x Virtual networks, and they're isolated from each other, our target is to route these via our firewall, we do this by setting up peering. We need two peering configs:
- Peering on UKS-FW-vNET1 to UKS-vNET-Spoke1
- Peering on UKS-FW-vNET1 to UKS-vNET-Spoke2
In new versions of the GUI (you'll not some differences between what you see and the official documentation) this will create Peering back the other way, I guess this had to be done manually before!
Navigate to the vNET: UKS-FW-vNET1 and click Add Peering
Take note of the bottom Enabled if that's not on, then Spoke 2 won't be able to speak to Spoke 1. If your vNET has an onward connect to a VPN gateway then you'll need to tick the bottom box.
Repeat for Spoke2.
Step 4 Create Some Routes
We need 2x routes, I reckon we could probably get away with bundling it together as one, but this feels cleaner and I know it works! 😝
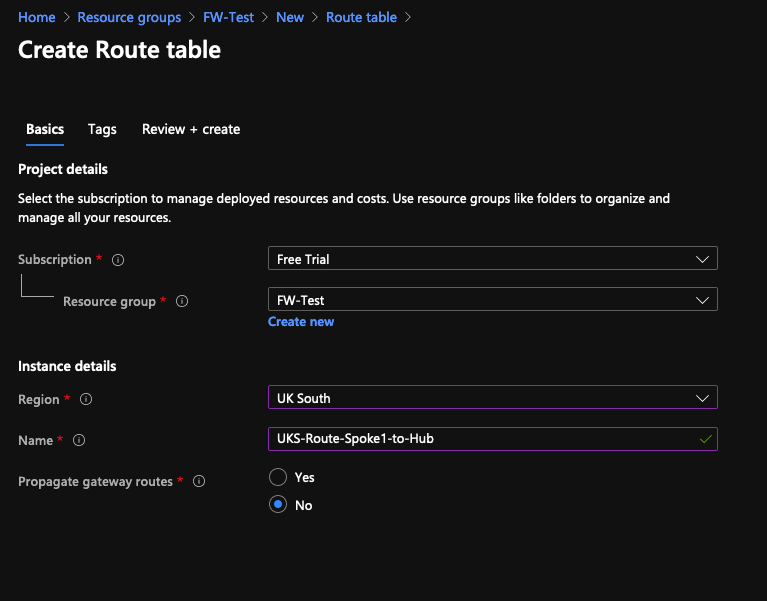
The plan is to setup a default route for UKS-Spoke1-Subnet1/2 to the Firewall, we don't need static routes back the other way, that's sorted by the peering, these static routes give us Internet access and Spoke-to-Spoke connectivity.
Create a new Route Table: UKS-Route-Spoke1-to-Hub
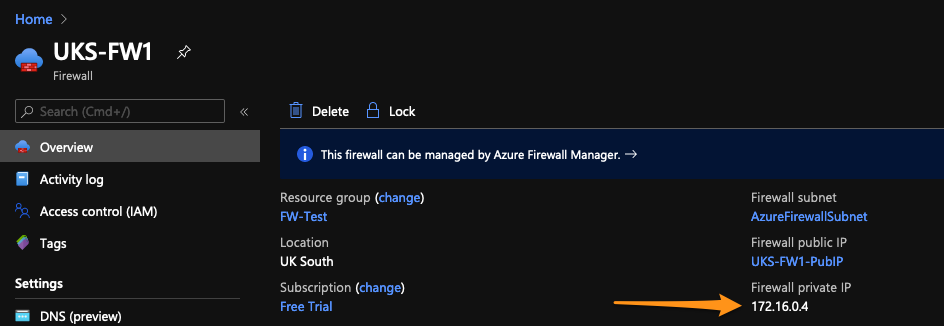
For the next step, you need to pop back to the firewall and grab the private IP... in my example it's 172.16.0.4.
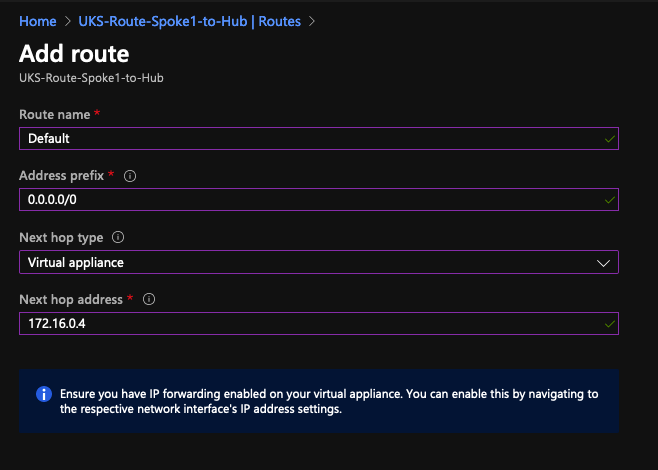
No go to the Route Table and add a default route, the gateway IP is going to the the private IP you just copied from the FW.
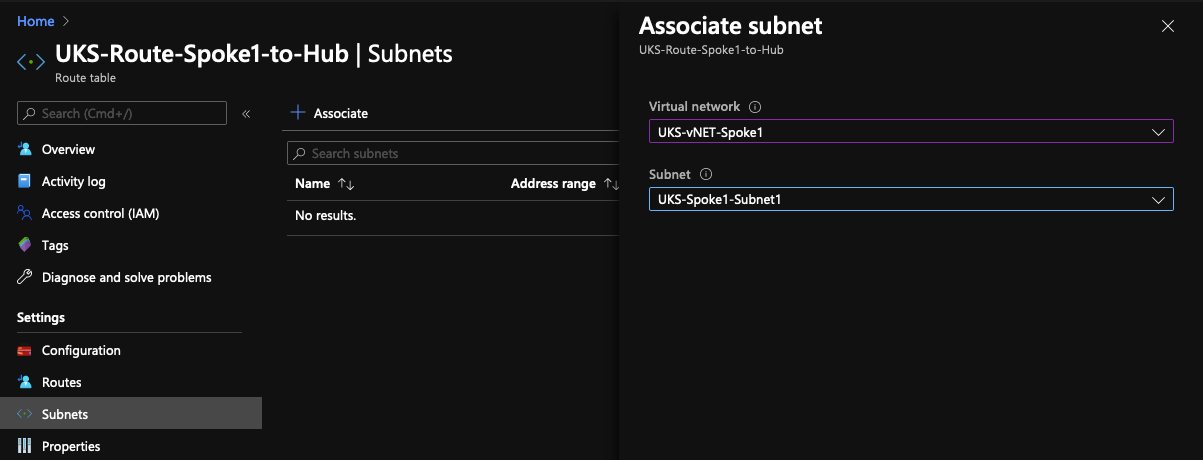
Then under Subnets, associate the Spoke1 Subnet.
All that done, now Repeat for UKS-Route-Spoke2-to-Hub!
Step 5 Add some machines
Foundations laid, we have something to stand a computer on lets build a couple of test machines. We'll use a windows server as a GUI client and a linux box as a server.
Windows - Spoke 1
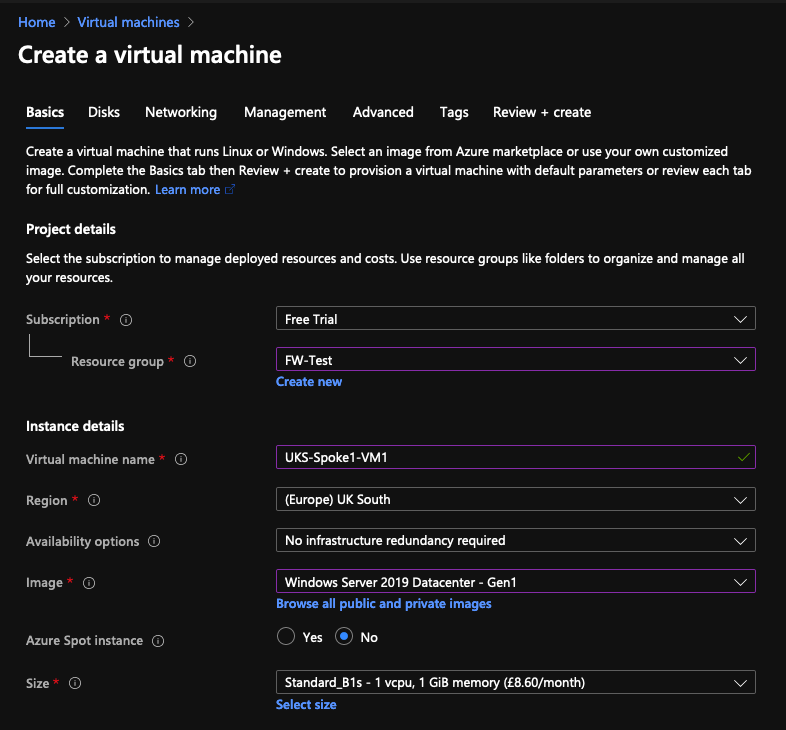
Build a basic Windows 2019 Server...
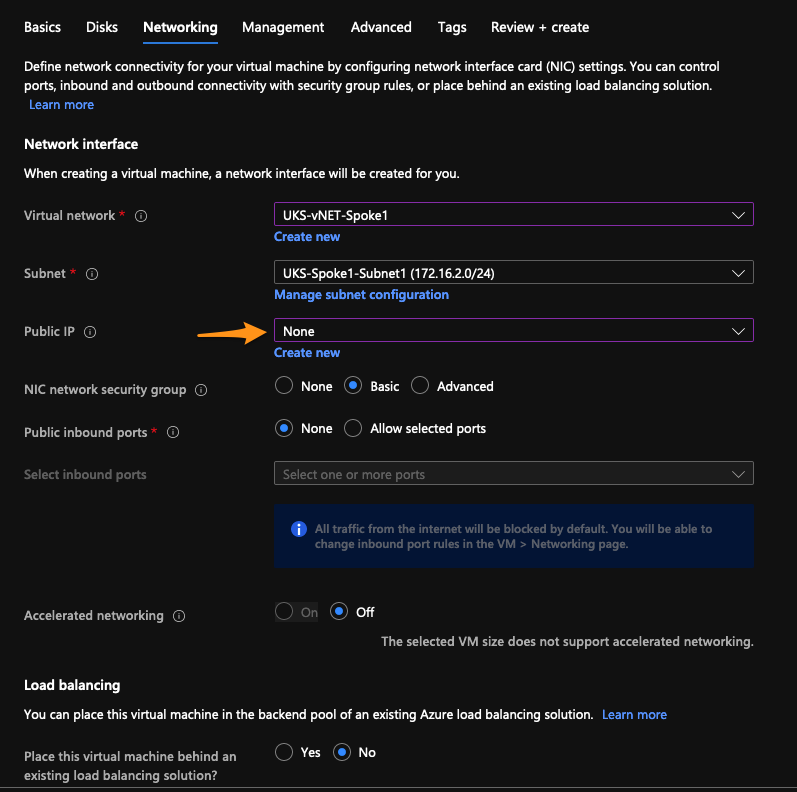
Default Disk Settings is fine, but Networking settings are important, assign the server to Spoke1, Subnet1 and disable public IPS ...
Default settings for Management and advanced also fine.
Linux - Spoke 2
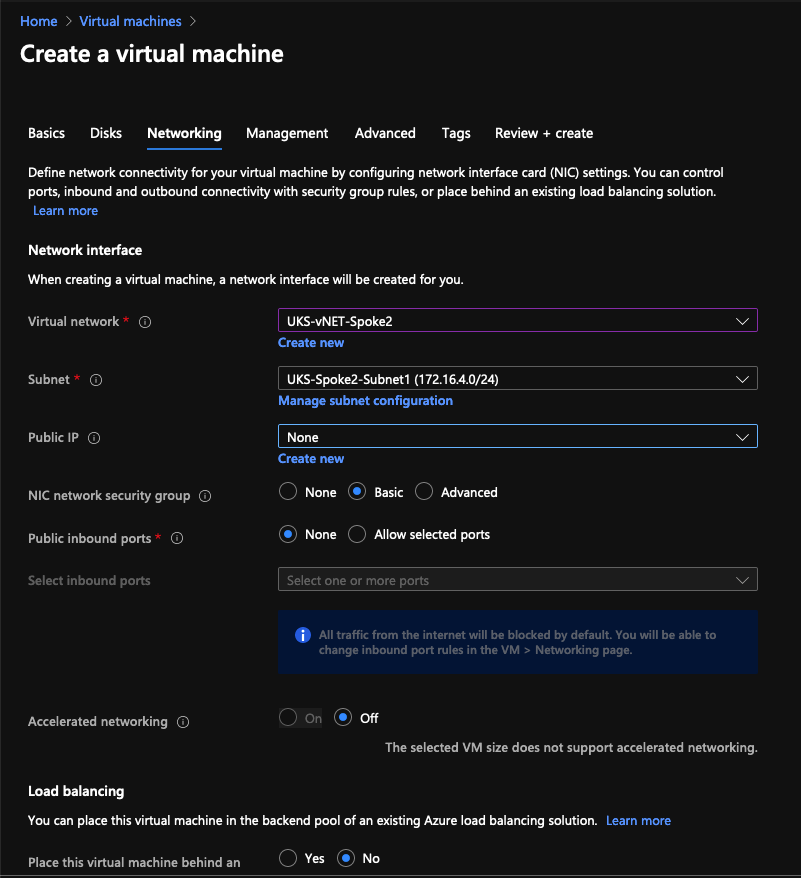
Build a Linux Server, pick whatever distro makes you happy; you can build a 2nd windows box if you like, but you'll have to install IIS afterwards for some sensible testing.
We're basically repeating the steps from above, the networking tab is the detail to pay attention to...
Step 6 - Bastions, get access to the machines.
As those servers build/deploy you'll be thinking, how am I going to access them?! Well, remember we left some space in the Subnets/vNETs, we'll use Microsoft's Bastion solution.
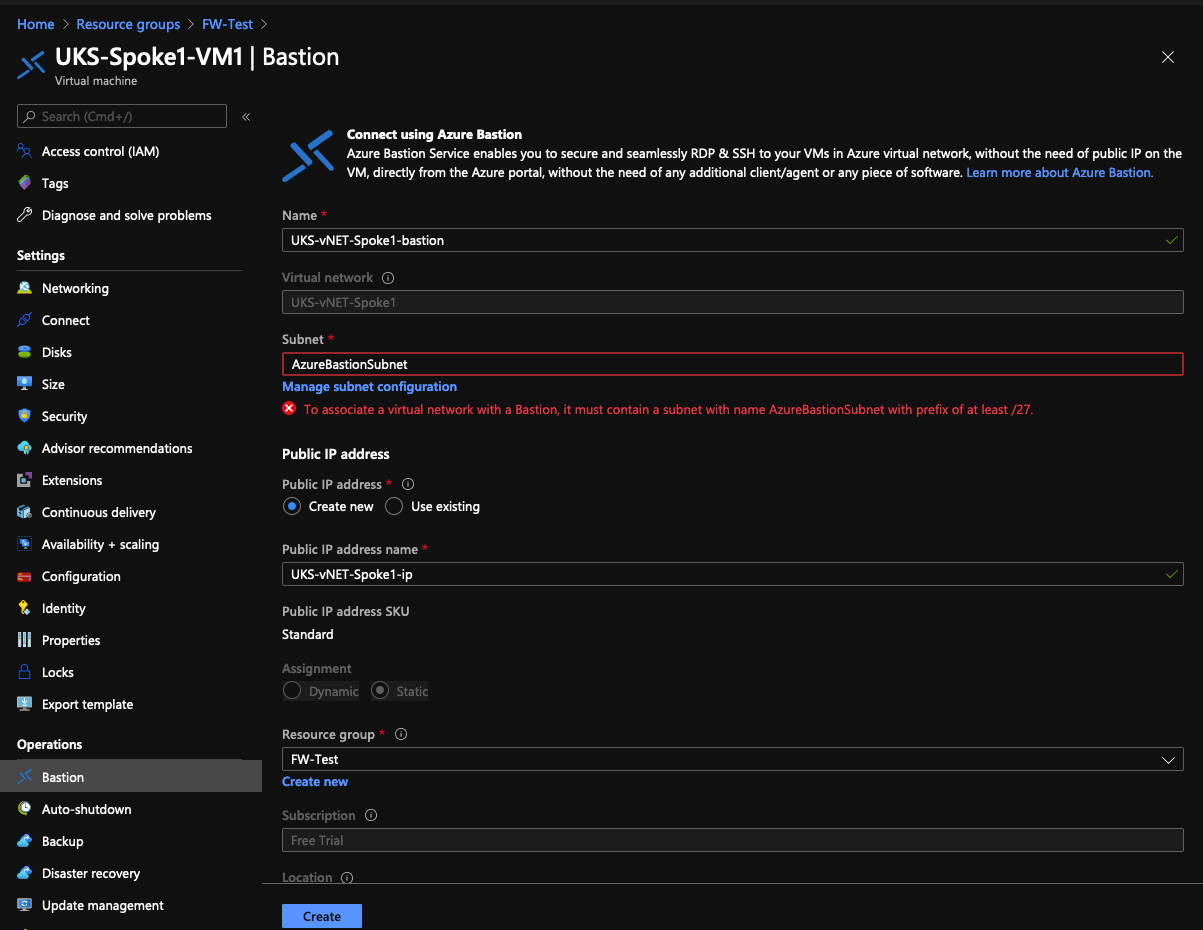
Go to your VM, scroll to the bottom and select Bastion, you'll notice there's a red error!
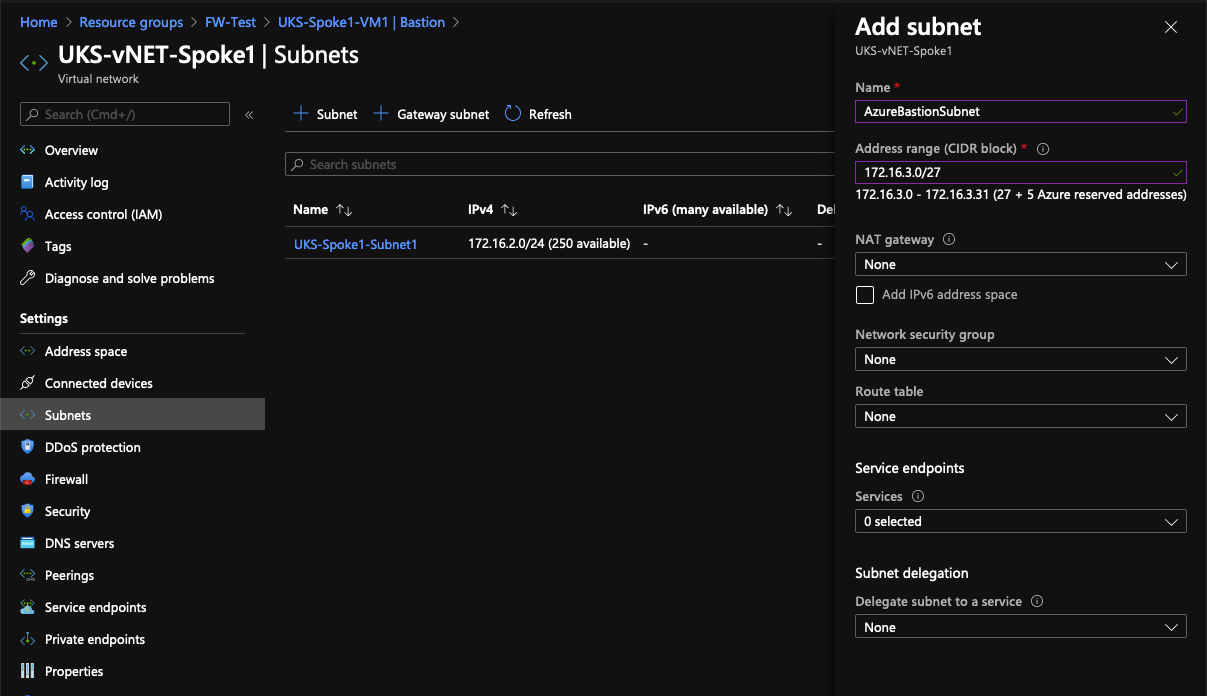
Click on Manage Subnet Configuration ... you need to create a subnet called AzureBastionSubnet ← That's a special/reserved name. Bastion's only need a small /27 subnet.
Once the subnet has been created you can then click the create button with no errors. Repeat for Spoke 2.
Test
Finally! After all that setup, we're ready to log into a server. Connect to your linux box first (Using the Bastion Option), install apache & start it.
Now connect to your Windows box:
- open Internet Explorer you should be able to browse the web. Disable Enhanced Security if you want/need to! (Note: That's why I'm using Umbrella as a compensating control)
- Now connect to your linux box, that should work to
- Open a Command Prompt, if you created an ICMP rule, ping should work. If you are pining from the linux box, remember windows servers come with host based firewalls, you'll need a rule there to allow ICMP as well.
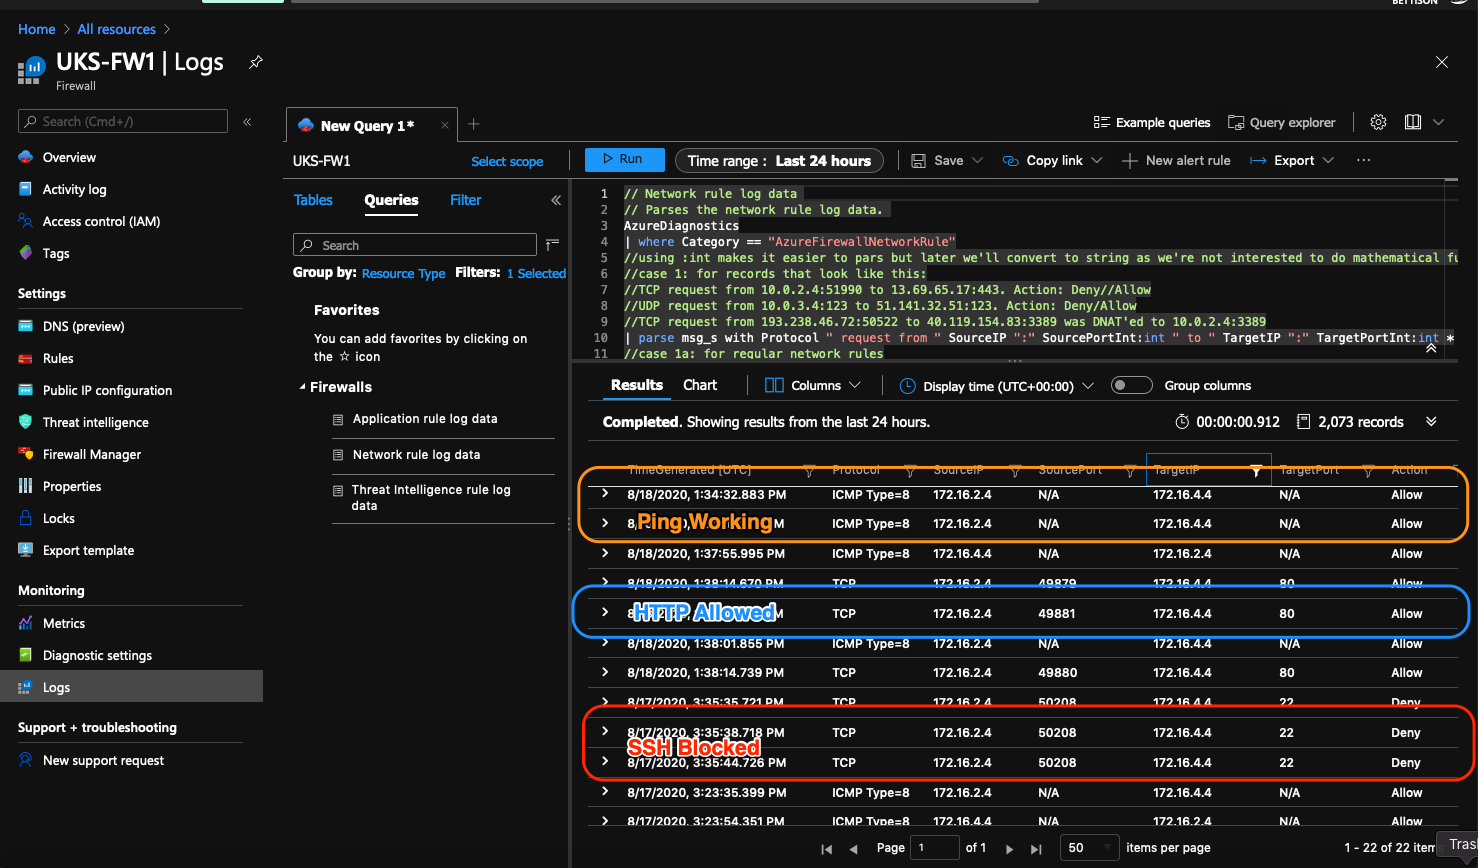
- Finally, download putty and try to SSH to your linux box, that should fail!
(No Screenshots here, I'm sure you can figure that out 😅)
Check the firewall logs!
If all your tests went as designed, you'll need to filter the firewall logs to see them as any Internet traffic will be filling up the logs.
END
I hope this is useful to someone, it took me a little while and some twitter frustration to get there, but I'm pleased with the result! If I can find the time, I'd like to re-create this in powershell and automate all the things!
References:
- https://docs.microsoft.com/en-us/azure/firewall/overview
- https://docs.microsoft.com/en-us/azure/firewall-manager/secure-hybrid-network
- https://docs.microsoft.com/en-us/azure/firewall/logs-and-metrics

