I've been meaning to do this for a while, but I've finally hacked Cisco ISE into VirtualBox for home lab learning and experimentation.
For those familiar with my ACS in VirtualBox post you should notice a very similar theme.
- Copy the .iso to a Web server directory that allows page indexing
- Hack the KickStart file (ks.cfg) to remove Cisco's hardware checks
- Boot the install CD using the custom ks.cfg
As before, I use the web installation method because it's the easiest way to hack/test/boot multiple times when you're trying to work out why the installer doesn't run... Also I will not be providing you an ISO file to download.
Web Server Configuration (nginx)
First, I mounted ise-1.4.0.253.x86_64.iso and copied the whole CD to ~/public_html/ise
Next, I need to expose this directory to the web server. I'm using nginx on CentOS... it's nice and easy, I added this to my config.
location /ise {
    root /home/nick/public_html/;
    autoindex on;
}
Replace ks.cfg
When you copy the contents of the CD to the local file system you'll notice all files have the RO flag set. Fix with chmod +w ~/public_html/ise/ks.cfg
There are a few things in the file you need to change:
- Replace
cdromon line 10 withurl --url http://192.168.10.122/ise/(replace 192.168.10.122 with the IP of your web server) - Optional, replace the encrypted root password with a new one
rootpw CISCO_ise_p455w0rdon line 12 - Comment out with a
#any/sbin/halt -fstatements to stop error messages from halting the installation - Replace any
cars_udi_utilstatements with your own versions, so...
UDI_PID=`/sbin/cars_udi_util -p`
UDI_VID=`/sbin/cars_udi_util -v`
UDI_SN=`/sbin/cars_udi_util -s`
becomes...
UDI_PID="Cisco-VM-SPID"
UDI_VID="1.0"
UDI_SN="123456789"
... and just for good measure, after validate_hwinfo(){ insert (on a new line) UDI_PID="Cisco-VM-SPID" to force hardware selection.
If you want, you can ignore all of that and just use my ks.cfg
VirtualBox Configuration
- CPU - 4
- RAM - 8Gb
- Hard Disk - SCSI - 100Gb (thin space allocation)
- CDRom -
ise-1.4.0.253.x86_64.iso - NIC 1 - Bridged
- NIC 2 - Host Only (disconnected)
All other defaults left alone.
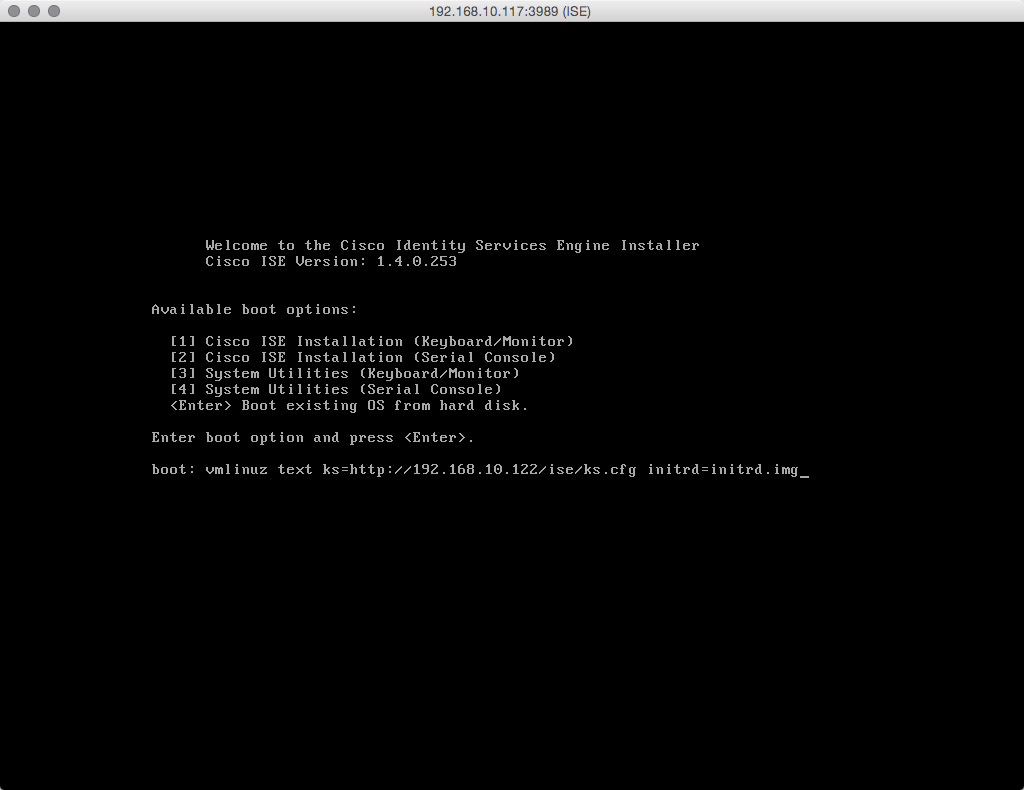
Boot the custom install
Boot the virtual machine from the Cisco ISO, but DO NOT select 1,2,3 or 4. Instead type:
vmlinuz text ks=http://192.168.10.122/ise/ks.cfg initrd=initrd.img
...replacing 192.168.10.122 with your web server IP.
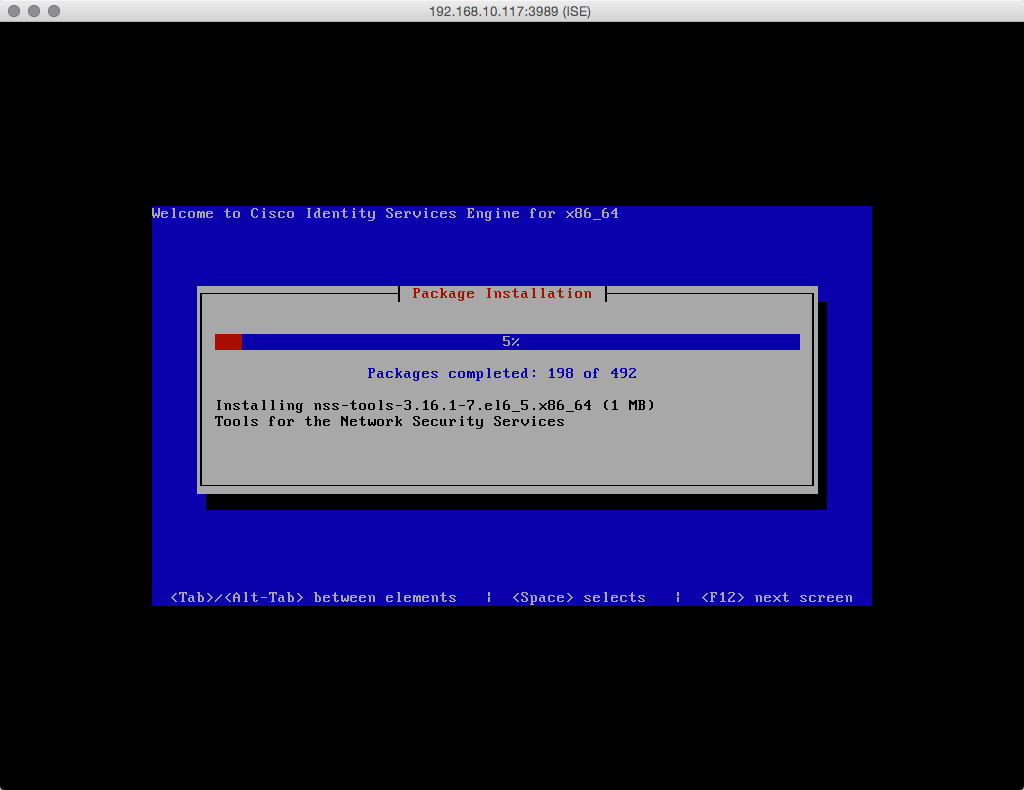
Wait, See, Enjoy!
With a little luck, the VM will load your custom KickStart file and begin the install.
If you tail your web server access logs, you should see stuff like:
192.168.10.116 - - [30/Jun/2015:18:50:49 +0100] "GET /ise/Packages/CARSCmdSched-2.0cars-1.x86_64.rpm HTTP/1.1" 200 28353 "-" "Cisco Identity Services Engine (anaconda)/1.3" "-"
192.168.10.116 - - [30/Jun/2015:18:50:49 +0100] "GET /ise/Packages/CARSICMPUtil-2.0cars-1.x86_64.rpm HTTP/1.1" 200 11425 "-" "Cisco Identity Services Engine (anaconda)/1.3" "-"
192.168.10.116 - - [30/Jun/2015:18:50:49 +0100] "GET /ise/Packages/CARSSysMon-2.0cars-1.x86_64.rpm HTTP/1.1" 200 34919 "-" "Cisco Identity Services Engine (anaconda)/1.3" "-"
192.168.10.116 - - [30/Jun/2015:18:50:49 +0100] "GET /ise/Packages/libdrm-2.4.39-1.el6.x86_64.rpm HTTP/1.1" 200 119408 "-" "Cisco Identity Services Engine (anaconda)/1.3" "-"
192.168.10.116 - - [30/Jun/2015:18:50:49 +0100] "GET /ise/Packages/plymouth-0.8.3-27.el6.centos.x86_64.rpm HTTP/1.1" 200 91056 "-" "Cisco Identity Services Engine (anaconda)/1.3" "-"
192.168.10.116 - - [30/Jun/2015:18:50:50 +0100] "GET /ise/Packages/rsyslog-5.8.10-6.el6.x86_64.rpm HTTP/1.1" 200 663780 "-" "Cisco Identity Services Engine (anaconda)/1.3" "-"
192.168.10.116 - - [30/Jun/2015:18:50:50 +0100] "GET /ise/Packages/cronie-anacron-1.4.4-7.el6.x86_64.rpm HTTP/1.1" 200 29768 "-" "Cisco Identity Services Engine (anaconda)/1.3" "-"
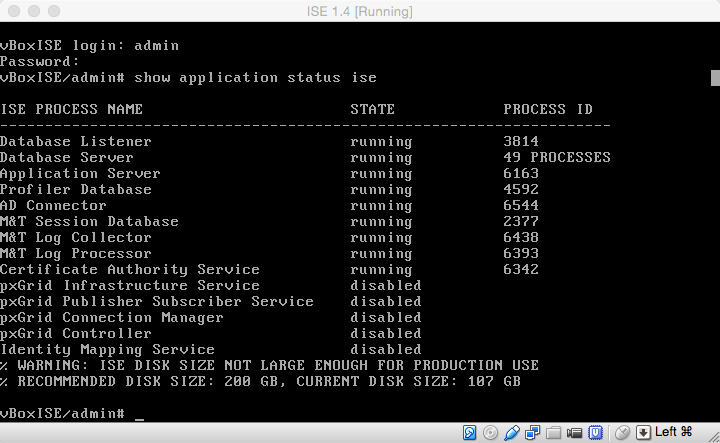
At the end of the install the VM should reboot into the normal setup login screen allowing you to complete the setup parameters
The setup will take ages, well over the 15/20mins that Cisco suggest but once it completes and reboots you should find you have a working ISE to play with.
... well, for 90days until the eval lic runs out!