
Recently I wrote a python script for converting mac addresses (which you can download from github) and the reason I wrote it is because I receive emails like this...
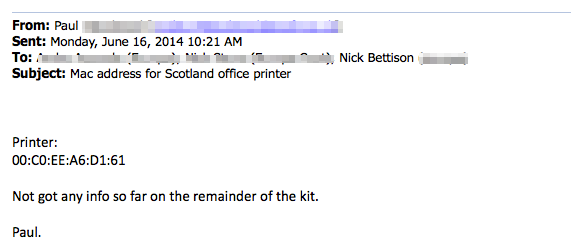
The background is, I'm working on an 802.1x project, I need to find the printer, the quickest solution in ...
